- Details
- Category: Recipes
Autumn is my favourite time of year. Absolutely nothing compares to it!
Winter is beautiful, but can cause many issues with eczema and the central heating being on.
Spring is the start of hay fever season, and Callum sneezes and has streaming eyes constantly.
Summer brings the hot temperatures and sore, dry, itchy skin, more hay fever, and also increased issues with asthma.
Autumn however, still has warm enough temperatures for the days to be enjoyable, sunny enough for the kids to still want to play outside, and the countryside turns into a beautiful picture, as the leaves turn their wonderful shades of red, orange and gold.
You wake up in the morning to mist, and as the sun burns through, the days become glorious.
The fruit and veg that you've been cultivating all summer become ripe and ready to eat, and quite scrummy! (a cheeky greengage off a tree, or a plum, or a newly ripe late tomato - yummy!!)
And on top of that, you get the extra fruit, the stuff that mother nature nurtures and gives back to us as an extra surprise.
Blackberries
Rosehip
Elderberries
.......
Bet you're smiling as you're reading now! :)
So, the best way to keep that smile, is to make some scrummy things with those extra delights! I've been playing around with a recipe for a blackberry cake, which I promise to share another time. Then there's the crumbles, oh the crumbles!
And the stews and casseroles. You know the ones, where you can put them in the slow cooker at the start of the day, with all the root vegetables in season, and come home to a house smelling simply amazing!
Yep autumn is fab!!
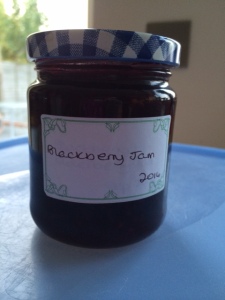
A recipe which is a huge hit in our house, is simple blackberry jam. It's so quick and easy to do, and it tastes soooo good!
This recipe will make around 6-7 jars.
You will need:
- around 900g fresh blackberries (washed!)
- 1kg jam sugar with added pectin
- a tablespoon of dairy-free spread (I find the stork bar is the best)
Method:
Add the blackberries to a large saucepan, and crush with a masher (or blend until smooth) - depending on how smooth you like your jam!
Add the jam sugar and cook over a gentle heat until all the sugar has dissolved. Stir continuously to ensure the jam doesn't stick or burn. (Do not allow the jam to boil!)
Add the tablespoon of dairy-free butter and stir in until dissolved
Increase the heat, and stir continuously, until the jam is boiling itself into a roll (it will roll and bubble and can't be stirred down!)
At this point, boil for 4 minutes.
After the 4 minutes is up, remove from the heat and then pour carefully into warm sterilised jars.
Cover, label and leave to set!
Enjoy!
(This jam is wonderful on toast, in cakes, on pancakes or even stirred into porridge!)
NB: Try it and let me know what you think, I promise you'll never buy shop bought again!
- Details
- Category: Recipes
Callum is a big fan of cake! What child isn't! :)
The problem with this, he doesn't tolerate egg in any form particularly well, truth be told, he reacts quite a bit to it. So, what ever cake I do make for him, it has to be dairy and egg free as a minimum!
Sounds simple in principle, reality is quite different. The basic science behind a cake dictates that it's the egg that helps it to rise and go all light and fluffy, instead of being dense and stodgy!
It's taken quite a few attempts to get this recipe right, and it has now become a firm favourite in our household.
It's a simple recipe, that can be jazzed up with an extra handful of blueberries, raspberries, blackberries, raisins, or even dairy-free choc chips at the very end!
You will need:
- 135g golden caster sugar
- 250g self raising flour
- 70g dairy-free spread
- 3 ripe bananas, mashed
- 1 teaspoon baking powder
- 1/4 teaspoon bicarb of soda
- 1/4 teaspoon salt
- 4 tablespoons dairy-free milk
Method:
Add all the ingredients apart from the milk to a large bowl, and stir until well combined.
Add the milk, and gently stir into the cake mix.
Then add any 'extras' to the cake mix.
Turn out into a prepared loaf tin, and bake in a preheated oven at 180c/ 350f/ Gas 4 for around 35-40 minutes or until the cake is golden in colour and a skewer comes out clean when the middle is checked.
Leave to cool slightly before turning out onto a cooling rack.
Enjoy!
- Details
- Category: Recipes
It can be quite hard to find yummy, and safe snacks when dealing with anyone who has to avoid dairy, nuts, citrus......!!
Biscuits become boring, cake - same old, fruit - yawn, crisps - unhealthy if eaten all the time.... you can just imagine the responses you get when offering possible options....! (Ok, all you mums and dads can stop laughing now!)
So, what's a mum to do!
It's the summer holidays, the kids have been on the go all day, you've been at work all day and have no energy or inclination to do or make anything....
Popcorn!!
Yep, those innocent little kernels can be turned into something truly scrummy, that is also safe, and relatively healthy if you avoid using copious amounts of sugar.
You will need:
- 120g popcorn kernels
- 1 tablespoon vegetable oil
- 1 tablespoon caster sugar
- pinch of salt
- 1 teaspoon ground cinnamon (if desired)
Method:
Add the popcorn kernels and oil to a large saucepan. Turn the heat up to medium-high, and put the lid on.
When the oil starts to fizz, add the sugar (and ground cinnamon if using). Put the lid back on and shake well, whilst holding the lid in place.
The popcorn kernels will soon start to pop. Continue to shake well, whilst holding the lid, so that the popcorn is well coated with the sugar.
Continue to cook until the popping slows, then remove from the heat and leave for around 30-40 seconds with the lid on to allow for the last of the kernels to pop.
Remove the lid, add the pinch of salt, replace the lid, and shake well.
Serve and enjoy!
- Details
- Category: Recipes
It's hot, it's officially sweltering in the UK at the moment!!
The kids are totally not bothered by eating, I'm constantly getting 'its too hot to eat mummy', and I can't say I blame them!
So, how to get them to eat something?! And more importantly, something good for them!
Callum needs extra nutrients and vitamins because of his restricted diet, so wherever I can get away with it, I make sure there's plenty of fruit and veg on offer.
At the moment we're trialling him with strawberries, and fingers crossed, so far, so good!
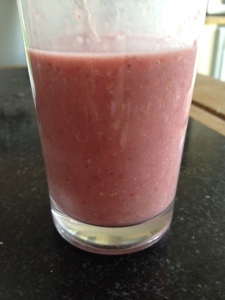
I made this fruit smoothie this afternoon, and it went down a storm! Best of all, not only is it packed full of flavour, it's also full of vitamins and nutrients. Happy days!
You will need:
- 1 punnet of strawberries, washed and hulled (chill in the fridge for 1hr)
- 2 bananas, peeled and sliced (chill in the fridge for 1hr before preparing)
- 1 tablespoon clear honey
- 1 cup of milk (you can use any milk, I use either Oatly or Koko for Callum)
(You can add 1/2 cup of porridge oats if you want to make for breakfast!)
Method:
Add all the ingredients to a food processor, and blitz for 2-3 minutes until smooth.
Serve and enjoy!
- Details
- Category: Recipes
Finally, the UK seems to have managed to get hold of some decent weather. And it has actually stuck around for more than just 48hrs! This is some sort of minor miracle! Ok, I jest slightly, but when you get more than a few days of sunshine and temperatures higher than 22c in the UK, it’s something to get excited about, believe me!
Everyone walks around with a smile on their faces, the mood everywhere is happier, and people just start to appreciate life and what they have.
With the warm, and lovely weather, comes the usual ‘summer’ expectations, the paddling pools come out, the BBQs are started up, and the ice cream van does its rounds touting for business by playing it’s tinny tunes (and no, we’re not one of the ‘cruel’ parents who say that when it plays music it means its run out!) :)
However, with each of these milestones for summer, comes obstacles that need to be addressed for children with allergies. Yup, nothing is simple with an atopic child!
You desperately want to make sure that they don’t miss out, so try to cover all eventualities. Which can prove challenging, very challenging!
For example, Chloe wanted to get the paddling pool out last weekend, and have a BBQ for tea with ice-cream for pudding.
Great idea!
Lots of fun, giggles and a wonderful way to cool them down!
Now for all the things to consider….
- Sun cream – will Callum react to it? (We actually use 'Aloha' which seems to be ok for him, if we plaster moisturiser as a barrier first!)
- Water – causes issues with eczema, so need to make sure Callum doesn’t stay in the water for long periods
- Drying off – wrapping in a towel and leaving to ‘air’ dry because ‘rubbing dry’ will cause the skin to become more irritated, especially if in the middle of a flare up
- Pollen – high levels will irritate the skin no matter what you do, and having a child run around butt naked means that the body is fully exposed to a strong allergen and likely to cause a major problem
- BBQs – making sure what ever you cook doesn’t cause any reactions, and that all sauces used are totally safe for Callum so no cross-contamination occurs. This can be very hard if at someone else's house for a BBQ, and I would usually bring Callum’s own food to ensure absolute safety at all times
- Ice cream van – it is utterly cruel to say no to your child when they ask for ice cream, especially on a hot summers day. But I have to! I can’t say yes to Chloe having a Mr Whippy, and then have a devastated Callum watch her eat it.
So, one solution to the dilemma, create your own ice cream/ sorbet!
This recipe is dairy-free, egg-free, nut-free and soya-free! It is so simple to do, but tastes utterly divine, and is a massive hit in our house!
You will need:
- 1 punnet of strawberries, washed and hulled
- 1 banana
- 1 carton of Oatly cream
- 1 tablespoon golden syrup
Method:
Freeze the fruit for 1hr, leave the banana in it's skin for this part of the process!
Remove the fruit from the freezer, peel the banana, and add the fruit to a magimix or blender, along with the carton of Oatly cream and the golden syrup.
Blend until smooth – this will take 2-3 minutes to ensure all the lumps have gone.
Return the mixture to the freezer in a suitable container for around 45 minutes - 1hr.
Serve either in a bowl with fresh fruit on top or in an ice cream cone.
Enjoy!
- Details
- Category: Recipes
Let's face it, it's no secret, I love cooking, everyone who really knows me, knows that cooking is at the heart of me, and I really enjoy finding new recipes that I can make allergy safe!
I have a really large collection of my own recipes (over 400 at last count!) that I have tweaked, altered and amended until the tastes were perfectly balanced, they were allergy safe, and above all, approved by the family.
I came across a recipe last week that sounded really quite scrummy, and more importantly, it was dairy-free! Happy days! Of course, I had to give it a go!
So, I checked out what ingredients I needed, I had to alter a few items slightly as I didn't have them to hand, but it turned out really tasty, in fact, so nice, that I thought I would share it with you all.
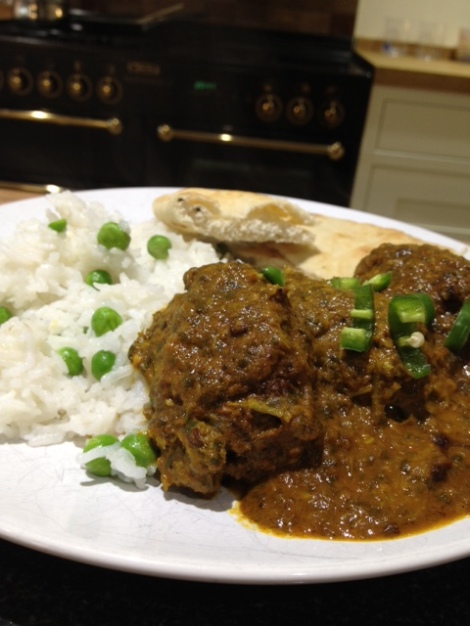
I present to you 'beef kofta curry' a la Jamie Oliver!
You will need:
- 1 x 250g pack of Puy Lentils (ready to eat ones)
- 1 tsp (heaped) garam masala
- 400g beef mince
- olive oil
- 3 tomatoes (I used 1/3 can of chopped tomatoes which worked just as well!)
- 3cm piece of root ginger, peeled
- 2 spring onions
- 1 fresh red chilli
- bunch of fresh coriander
- 1 tsp turmeric
- 1 tsp runny honey
- 2 tsp (heaped) rogan josh curry paste
- 1/2 a 400g tin of coconut milk (make sure you shake the tin before opening)
- 1 mug of basmati rice
- 200g peas
Method:
Put the lentils in a bowl, with a pinch of salt and pepper, the garam masala and the beef mince, then mix and scrunch together really well until everything is incorporated together.
Divide and mould the mixture into 12 fat fingers. Put them into a frying pan with a tablespoon of oil, turning once golden on each side.
Put 1 mug of rice into a large saucepan, with 2 mugs of boiling water. Add a lid to the saucepan and leave to cook on a medium heat.
Add the tomatoes to a liquidiser, add the peeled ginger, trimmed spring onions, half the chilli, the coriander, turmeric, honey, curry paste and coconut milk. Blend until a smooth consistency.
Pour the sauce onto the beef, bring to the boil, season and then leave to simmer.
Turn the heat off the rice saucepan, take the lid off, add the peas, and put the lid back on. Leave for 5 minutes.
Finely slice the remaining chilli, and scatter over the curry.
Enjoy! :)
- Details
- Category: Recipes
There are many things that change when dealing with allergies, every day foods become very difficult to achieve, unless you’re like me, never giving up until you nail a recipe! The satisfaction you get when actually getting one you’ve been working on for ages to be a success is something else! I was brought up in a half French/ half English household, and I really missed out on some of the staple childhood foods because my mum, bless her, didn’t know them/ hated the stodginess of them and the fact that a large number would use stewed fruit and/or raisins. The French are a ‘funny’ breed! (sorry mum, and my French relatives, love you really!)
My English gran would make up for it every time we came to see her, trifle, crumble, jam roly poly, fruit cake, Christmas pudding, mince pies, you name it, she’d make it. And they were absolutely scrummy! Probably all the more so, because we rarely got to have them!
Where possible, I’ve tried to re-create these staples for Callum, making them dairy and egg free. The one that I’ve struggled a bit with has been the jam roly poly. It just didn’t seem to get the right level of stodginess versus fluffiness. Until now!
I give you, dairy free, egg free, jam roly poly!!!!
You will need:
• 8oz (225g) self-raising flour
• 1 tsp baking powder
• Pinch of salt
• Finely grated zest of 1 lemon
• 5oz (140g) shredded suet
• 120ml dairy free milk
• ½ jar of your favourite jam (I used home-made blackberry and elderberry jam)
Method:
In a large bowl, sift together the flour, salt and baking powder and stir well.
Then add the lemon zest and suet, and rub the mixture with your fingers (as if making pastry) until well combined and it looks like fine breadcrumbs. (This can be really therapeutic!)
Gently add the milk a little bit at a time, stirring well after each addition, and then really squeeze the mixture with your hands until everything is mixed together and you have a gooey dough like ball.
Wrap well in clingfilm and leave in the fridge for at least half an hour.
Prep your workbench before removing the dough from the fridge. Cut a large piece of greaseproof paper, lay it out on your workbench, and sprinkle with a little self-raising flour. At the same time, sprinkle a little flour over your rolling pin to stop it sticking to the dough. Remove the dough, unwrap, and lay on the floured greaseproof paper.
Roll the dough out into a rectangle, roughly the size of a large roasting tin.
Spread over the jam, leaving an inch border all around the edge.
Brush the border with a little extra dairy free milk.
Using the greaseproof paper to help you, roll the dough at the shorter end, making sure your seem is on the top.
Brush a little extra milk to make sure it is sealed.
Twist and fold the edges under to ensure they are well sealed.
(It is really important to do both these steps well, so that the jam doesn’t seep out!)
Then wrap the roly poly loosely in greaseproof paper, repeat with foil, and use string to tie the ends tightly.
Then make yourself a little handle using extra string to tie the 2 bits of string at the ends together.
Steam the roly poly for around 2 hrs, and then enjoy!
I served it with dairy free, egg free custard!
Yummy!


